Step-by-step Guide On Building a Chatbot Using DialogFlow
In this article, you will learn how to build your own chatbot using Dialogflow through simple, step-by-step instructions. Here’s the overview:
Contents:
– The Context
– The ‘Dictionary’
– The Guide
- Level 1 – Getting Started
- Level 2 – Bot Development
- Level 3 – Entities, Actions & Parameters
- Level 4 – Integration
- Level 5 – Training & Fallbacks
– Moving Ahead
The Context:
Understanding the Chatbot need-
Websites play a big role in the conversion of potential customers to sales. Businesses have realized that with the addition of chatbots to their webpages, visitors stay engaged for much longer, thereby greatly improving these conversion rates.
Chatbots have also been acknowledged as an excellent resource for collecting and sharing relevant information. Furthermore, the automation of simple business processes without sacrificing human resources makes this a very economical way of generating online value.
But, before one goes ahead and starts building a chatbot, it is important to know what the primary purpose of that bot would be –
- Answering FAQs?
- Providing product information?
- Booking appointments?
The applications are endless.
So for our guide, given that we have worked so closely with the food & beverage industry, we have chosen a rather fun application for a chatbot: Ordering a Burger.
However, before we rush off to it, take a few minutes to familiarize yourself with the jargon we will use while building a chatbot using Dialogflow.
The ‘Dictionary’
Learn the jargon/slang associated with building a chatbot on Dialogflow and start sounding like a true pro.
Dialogflow – Dialogflow is a Google-owned framework that enables users to develop human-computer interaction technologies that can support Natural Language Processing (NLP). Basically, it lets you make Digital Programs that interact with end users through natural languages. Therefore, you could even say that Dialogflow enables the creation of Conversational User Experience Platforms (CUXP).
With Dialogflow, you get the ability to ‘one-click integrate’ with most of the popular messaging platforms such as Facebook, Twitter, Instagram, etc. In this guide, we will be using its ‘Web Demo’ feature to simulate how a basic form of this integration would appear.
‘User‘ – A user is any human being who uses the chatbot technology. They can play any role: owning the chatbot, developing the bot, or interacting with the same. As long as they are human, they are termed ‘user’.
Their exact role is often clear from context so rest assured, you won’t be confused!
Text/Voice – These are the modes used to communicate the input or the output. The user interacts with the bot through text or through voice. Text would be anything that is typed into the chatbot window and voice would be any message spoken into the chatbot window.
Different chatbots support different inputs/outputs. Though it is very common to use text since it does away with issues of microphone access, noisy surroundings, diction issues, etc., it is becoming increasingly popular for bots to support both.
Agent – An agent is merely another term used to refer to the chatbot. Sometimes people say ‘agent’ when referring to the processing module within the application that enables discussions with the chatbot. And sometimes, it is another way to refer to the bot since it functions ‘like a support agent’. The context will always be clear enough for you know what they mean.
While using Dialogflow, you will find that many people start off by asking you to ‘name the agent.’ This just means giving your chatbot a name, so even in this context, its one and the same.
Expressions – Expressions/Training Phrases are the dialogues/utterances that people say when they interact with a bot. They represent a user’s desire and are often in the form of a question. For example –
“Is the store open?”
“Do you serve vegetarian?”
“Where is my order?”
One of the first rules to accept when working with Expressions in Chatbot Development is that, the same thing, can and will be said in different ways.
See our three dialogues above? Let’s rephrase them:
“What are your store timings?”
“Do you only serve non-veg?”
“My order is late.”
Different people say the same things in different ways. It is, therefore, very important to predict/collate a set of Expressions (often referred to as FAQs), when you are training your chatbot to answer them. These FAQs will be laying the groundwork when you start developing your bot.
Intent – ‘Intents’ are how a chatbot understands Expressions.
We just saw how varied Expressions can be while still meaning the same thing. This meaning is termed as an Intent, wherein we extract what the user intends to say through his/her Expression.
It is the simple process of grouping expressions into their one meaning, thereby making it easier to program.
Let’s determine an Intent from the following Expressions in the following example:
“Are you closed on Sundays?”
“What time do you open?”
“What are your store timings?”
All these Expressions want to know about the Store Timings. The Intent can therefore be, ‘Store Timings‘.
By using Intents you don’t have to teach your chatbot how to respond to every Expression. Instead, you can just categorise Expressions into Intents that the bot can easily tackle. It is a lot simpler for both the developer and the chatbot this way.
Ultimately, Intents determine the bot’s responses.
Responses: This is the chatbot’s output that is aimed at satisfying the user’s intent.
For example, if the Expressions trigger the Intent ‘Store Timings’, the chatbot can respond saying,
“The store is open everyday from 10:00 hrs to 23:00 hrs, except Sundays.”
The most accurate responses occur when a proper range of expressions have been correctly grouped into Intents. Accurate and simple responses are important traits for a good chatbot.
Entities: ‘Entities’ are Dialogflow’s mechanism for identifying and extracting useful data from natural language inputs.
An Intent limits the bot to the scope of the user input. Entities enable it to extract specific pieces of information from your users. This can be anything from burger toppings to appointment dates. Basically, if there is any important data you want to get from the user, you will use a corresponding entity.
Actions & Parameters: These too, are Dialogflow mechanisms. They serve as a method to identify/annotate the keywords/values in the training phrases by connecting them with Entities.
They also provide the prompts that extract information from the user. For example:
“When do you want an appointment?”
“What toppings would you like?”
Actions allow the developer to work with code; but we will make our BurgerBot without it, so relax!
Annotate: The ability of Dialogflow to recognize and link keywords/values between Parameters, Expressions and Entities.
Let’s finally put everything we learned into action and make our own ‘BurgerBot’. Here’s the guide!

The Guide:
Level 1 – Getting Started
Step 1: Getting set up with a DialogFlow Account.
- Go to https://dialogflow.com/
- Click ‘Go to console’ in the top right corner.
- Login with a Gmail account when prompted.

Step 2: Creating an Agent
- Start off by clicking ‘Create Agent’ in the column menu to your left.
- Give your Bot a name! We’re going to call ours a ‘BurgerBot’.
- Be sure to select your time zone and language as required.
- Click ‘Create’.
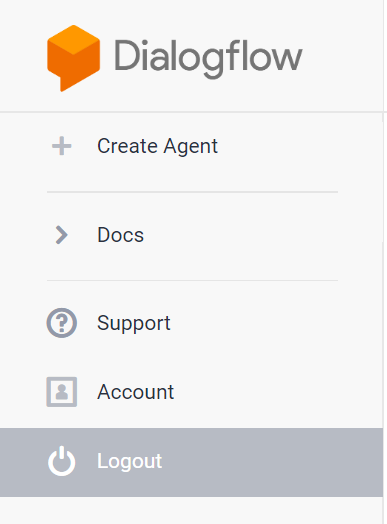

Congratulations! You have created your first agent. Once the system recognizes it, you will see how massively your left column menu expands.
Let’s use some of these features and develop our BurgerBot.
Level 2 – Bot Development
Step 1: Checking out the Preset Intents
Dialogflow provides basic presets like a Default Welcome Intent and a Default Fallback Intent.
This is just telling the bot what to do when welcoming someone or when the bot doesn’t know the answer to their question. Click on ‘Default Welcome Intent’.
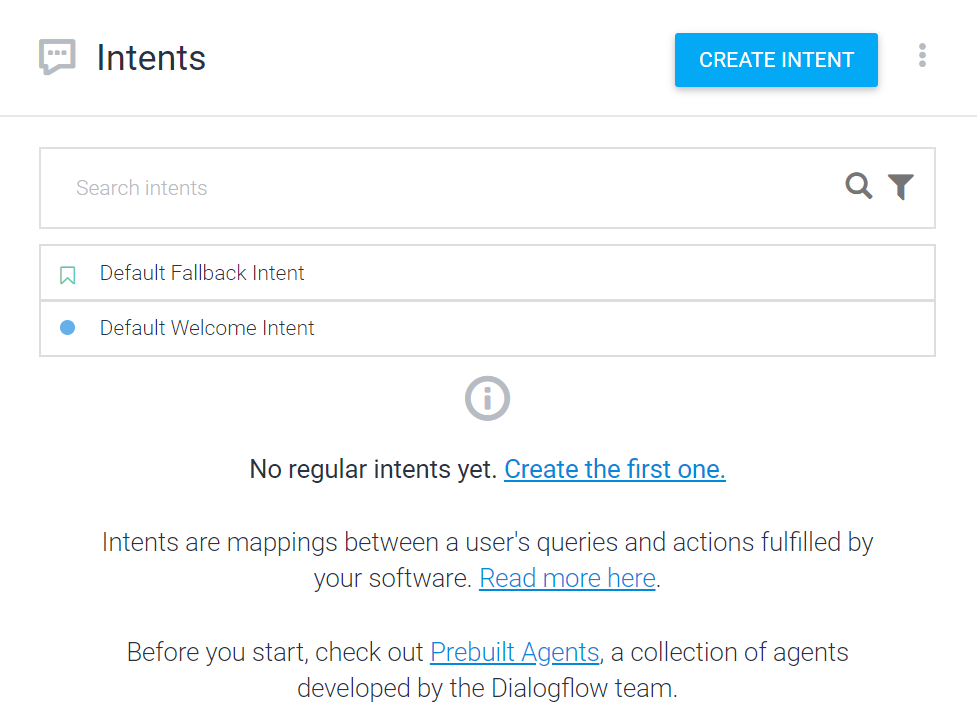
Scroll to the ‘Training phrases’ section. Here you will see a set of conversation starter Expressions that a user might say to our BurgerBot. Note that all of these convey the same message, and are therefore categorized under one Intent: ‘Default Welcome Intent’.
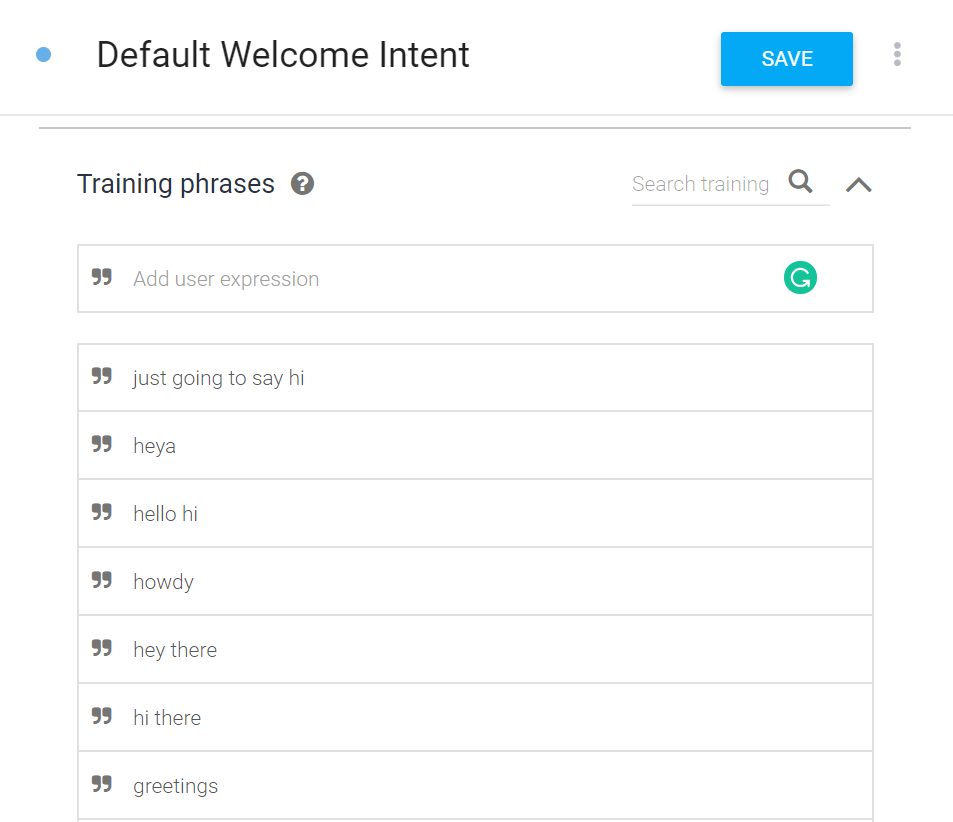
The expressions seems to cover pretty much all the ways a user might start the conversation, so we don’t need to adjust anything here. Let’s test this out:
In the top right section you can test how the BurgerBot performs. Type a conversation starter, like Hey or Hi or Hello.
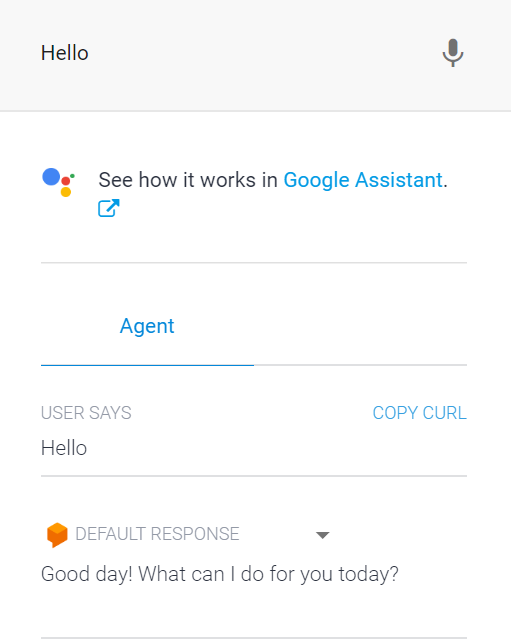
The BurgerBot is alive! Try other expressions again and you’ll see that it picks a response at random. Let’s check out these responses and make our first edit!
Step 2: Creating a custom response under Default Welcome Intent
Scroll down to the ‘Responses’ section. Here you can see the different responses that our BurgerBot picked randomly when we entered an expression.
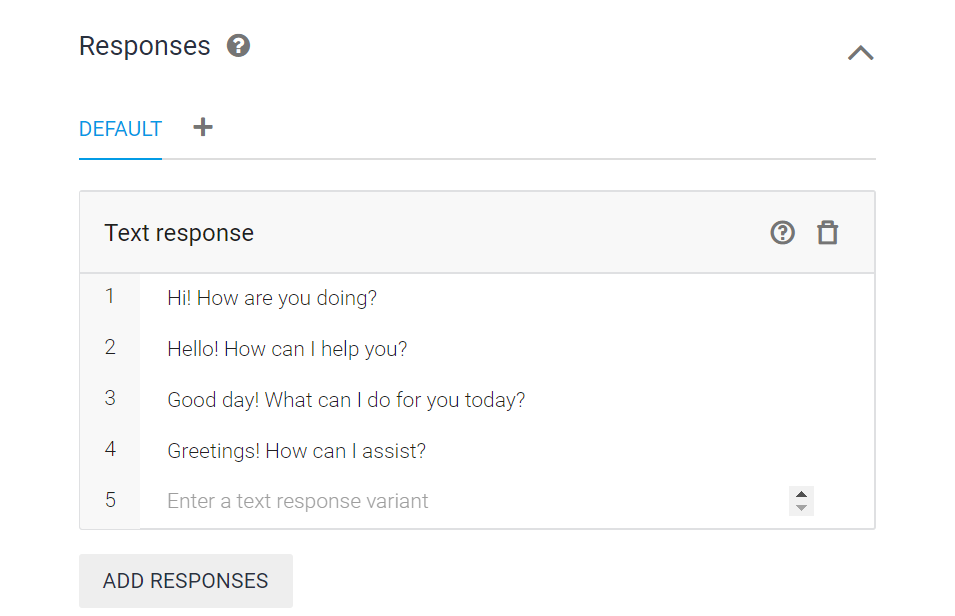
We are going to create a special welcoming response that suits our restaurant: Patty Palace.
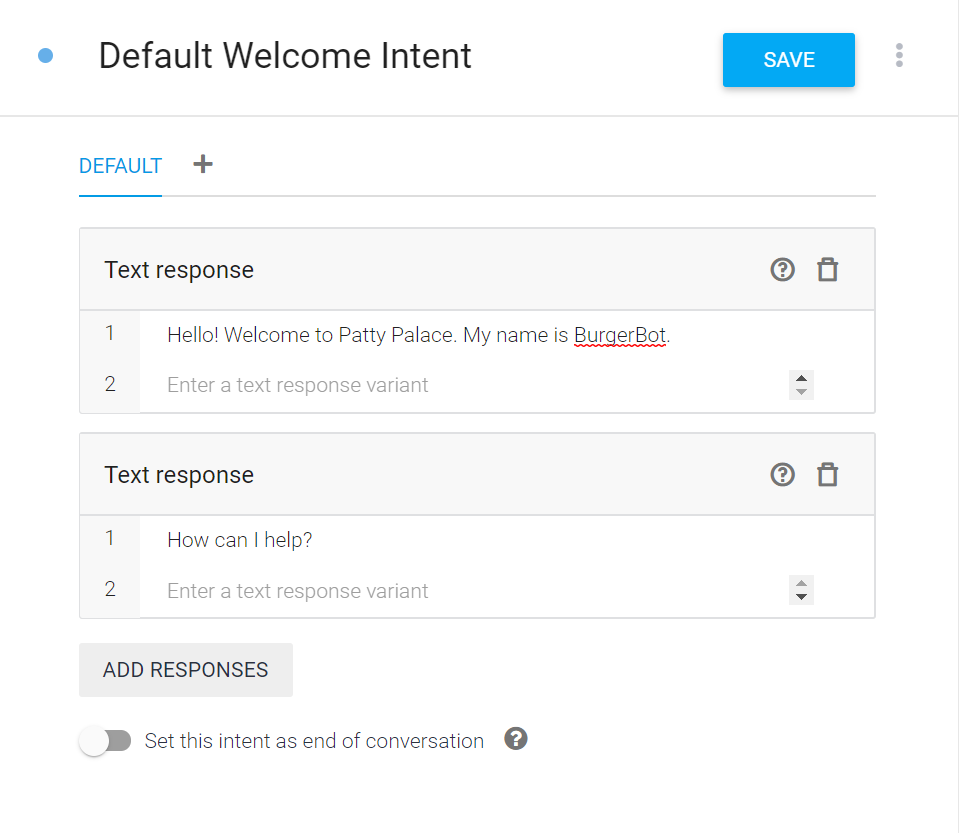
“Hello! Welcome to Patty Palace. My name is BurgerBot.”
Add this text below the existing responses. We can simply delete the other generic responses since we don’t need them anymore. To delete, simply press the ‘trashcan’ button to the right of every response.
But our response is not complete yet. Let’s finish it by adding a second line. To add a new line, Click ‘Add Responses’ and select ‘Text Response’.
Here’s an example of what you can do with it.
And here is how it would look:
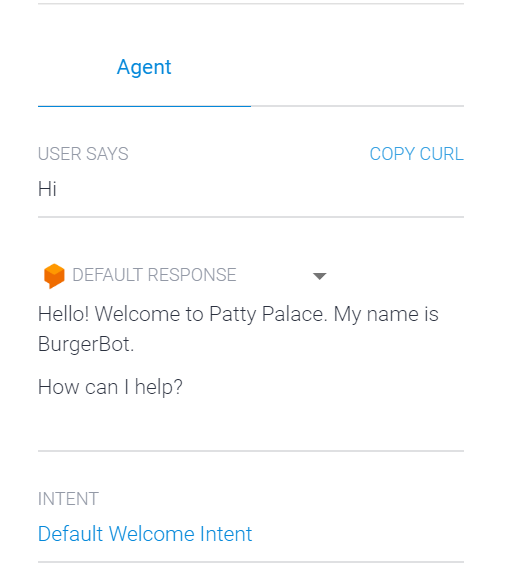
You can add as many lines as you want, but be sure to simulate a friendly, human agent-like experience for your users.
CAUTION: Never forget to Save
Never forget to click the ‘Save’ button at the top. Your changes will not take effect if you have not selected ‘Save’. Always look for these icons that give you the green signal to go ahead:


Great Job! We have set base for our BurgerBot to welcome users. Let’s proceed to equip our bot with more helpful skills.
Step 3: Creating New Intents
Let’s develop our BurgerBot to assist users with some common queries:
“What are your delivery timings?”
“Is there anything new?”
“I’d like to order a burger”
We’ll create Intents for each of these question-types, then feed-in the appropriate Expressions & Responses.
To create a new Intent, simply click the ‘+’ next to the ‘Intents’ button in the left menu.
Be organised when naming an Intent so that it is easy for you to recognise later.
Points to remember:
- Add a variety of Expressions
- Group Expressions correctly under well-defined Intents
- Keep Responses precise
- Always click ‘Save’.
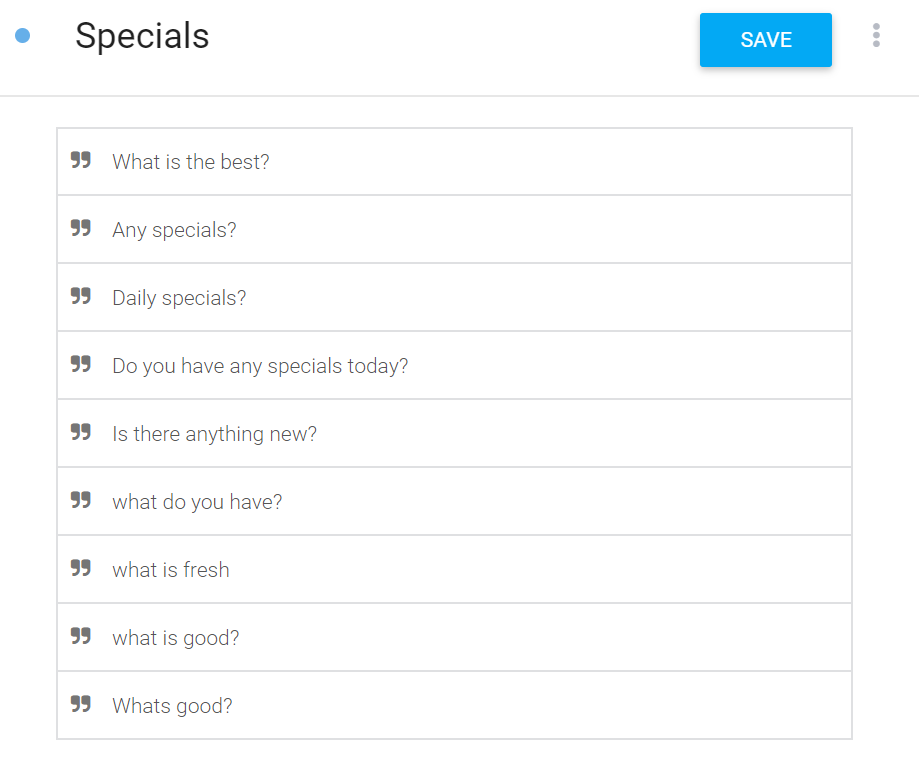
Here’s an example of what you can do with your first two intents:
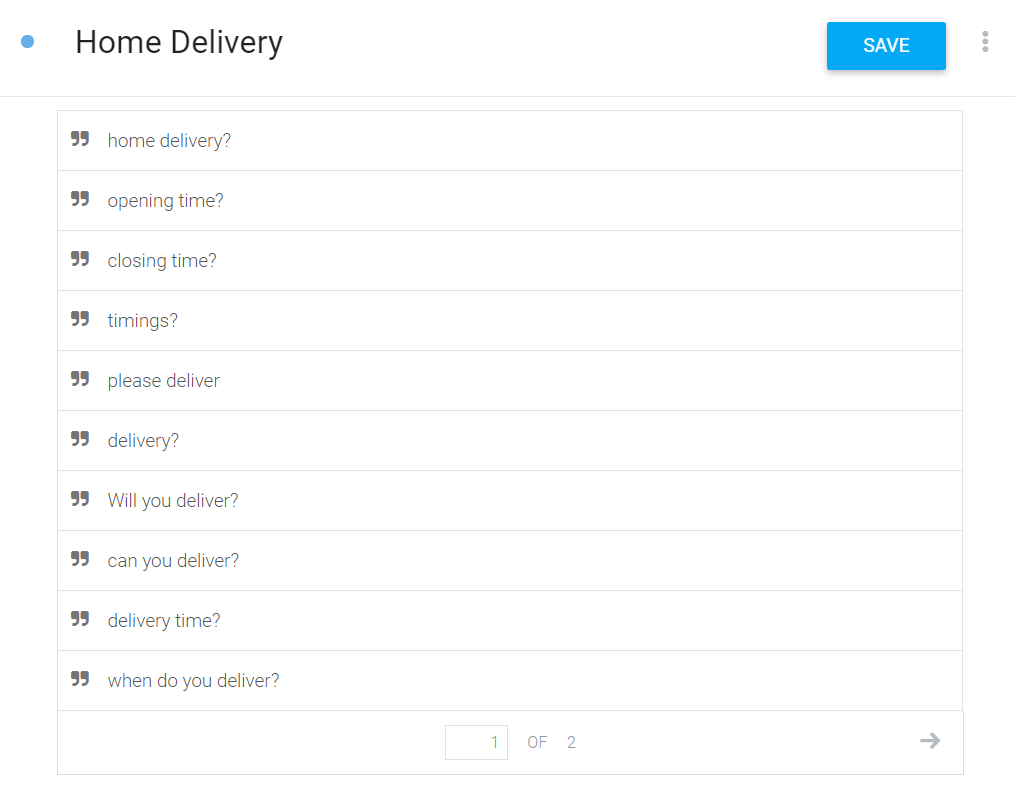
Expressions – New Intent
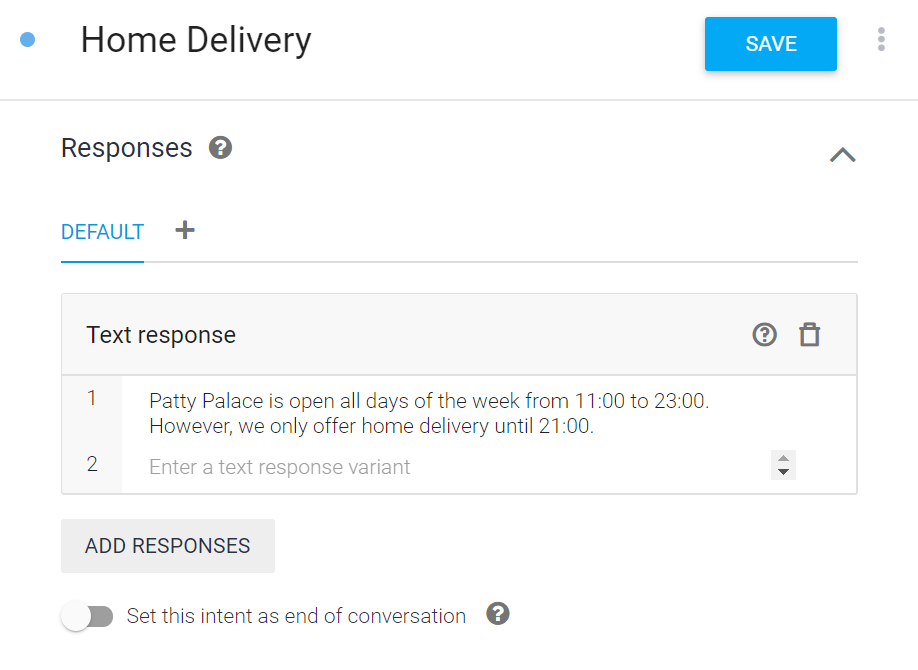
Response – New Intent
Expressions – New Intent
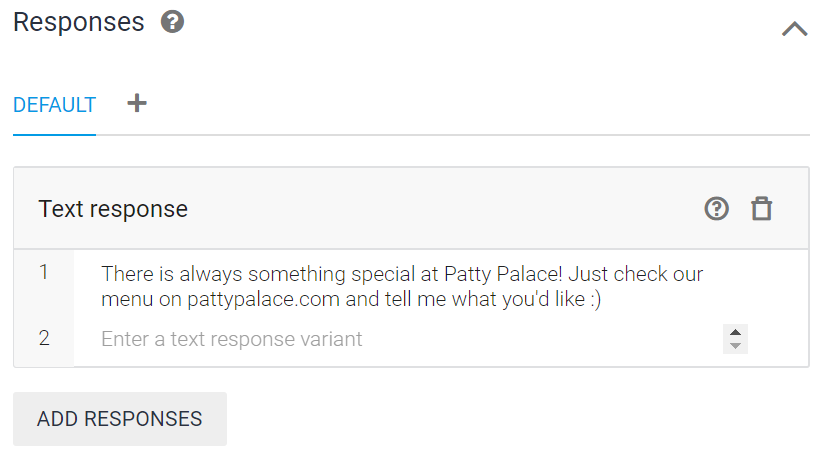
Response – New Intent
Great job! Let’s kick this up a notch.
Level 3: Entities, Actions & Parameters
Let’s make one more Intent so that BurgerBot can start taking orders.
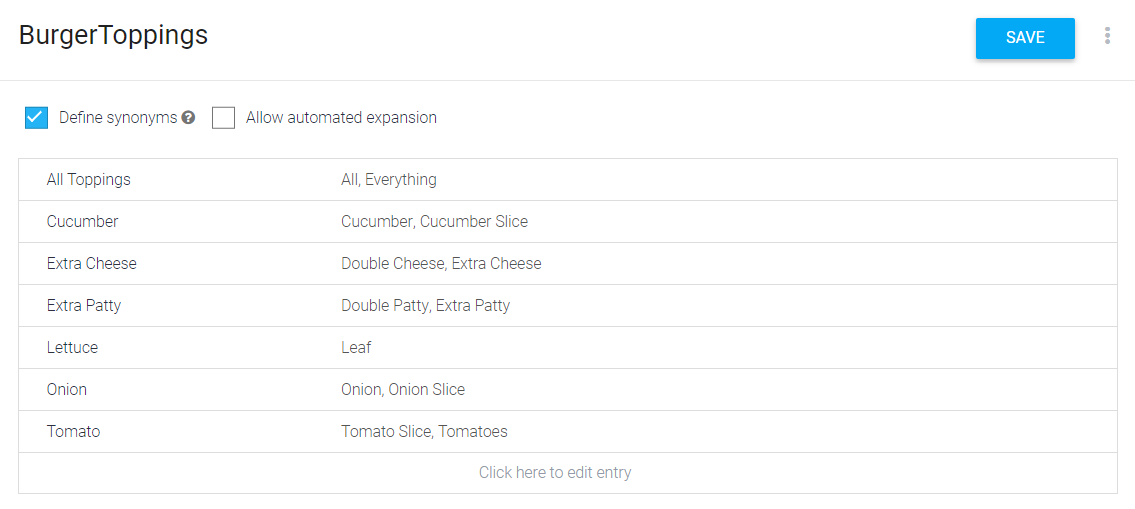
Step 1: Creating Entities
- Click the ‘+’ next to the ‘Entities’ button in the left menu.
- Enter the values of the Burger Buns and Toppings separately
- Be sure to add appropriate synonyms


Step 2: Creating the Intent
- Name the new Intent ‘Placing Orders’
- Scroll down to add parameters first
Step 3: Actions & Parameters
- Name the Parameters
- Enter the ‘Entity’ that you created, starting with the ‘@’ symbol
- Enter corresponding ‘Value’, starting with the ‘$’ sign
- Check the ‘Required’ box to enable ‘Prompts’
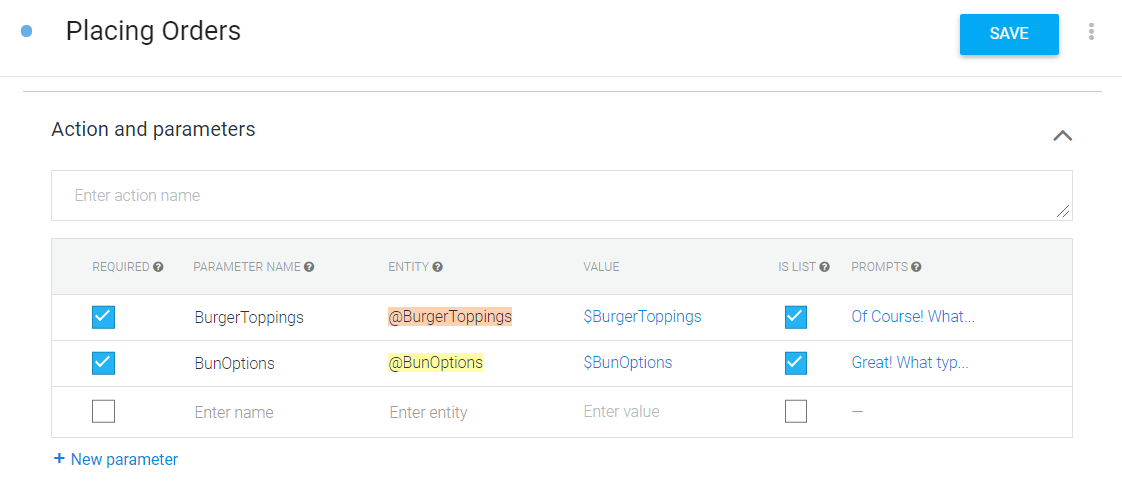
- Add prompt messages like shown below
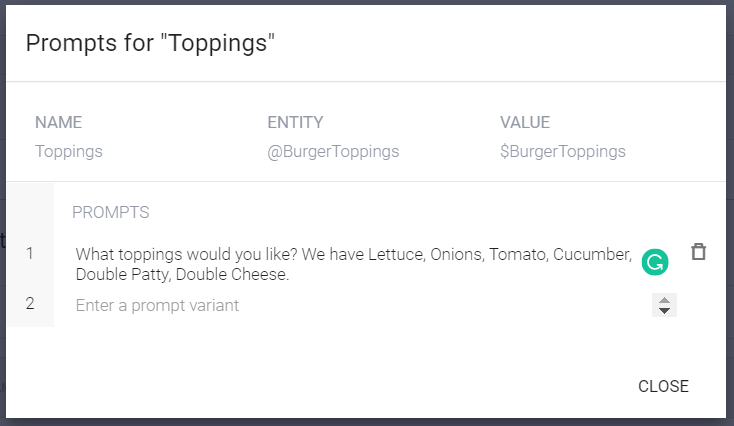
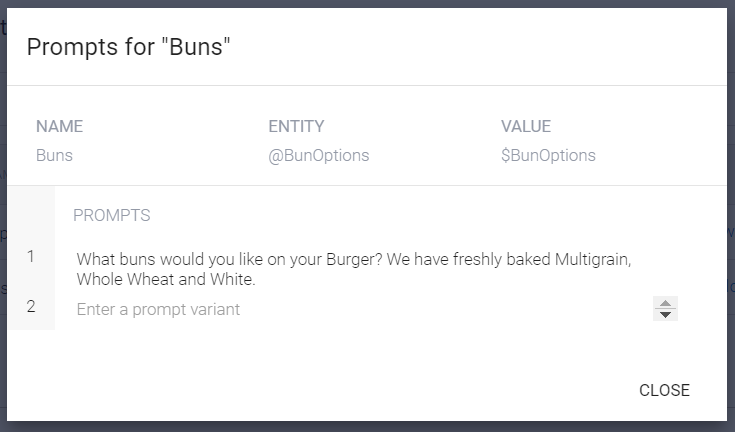
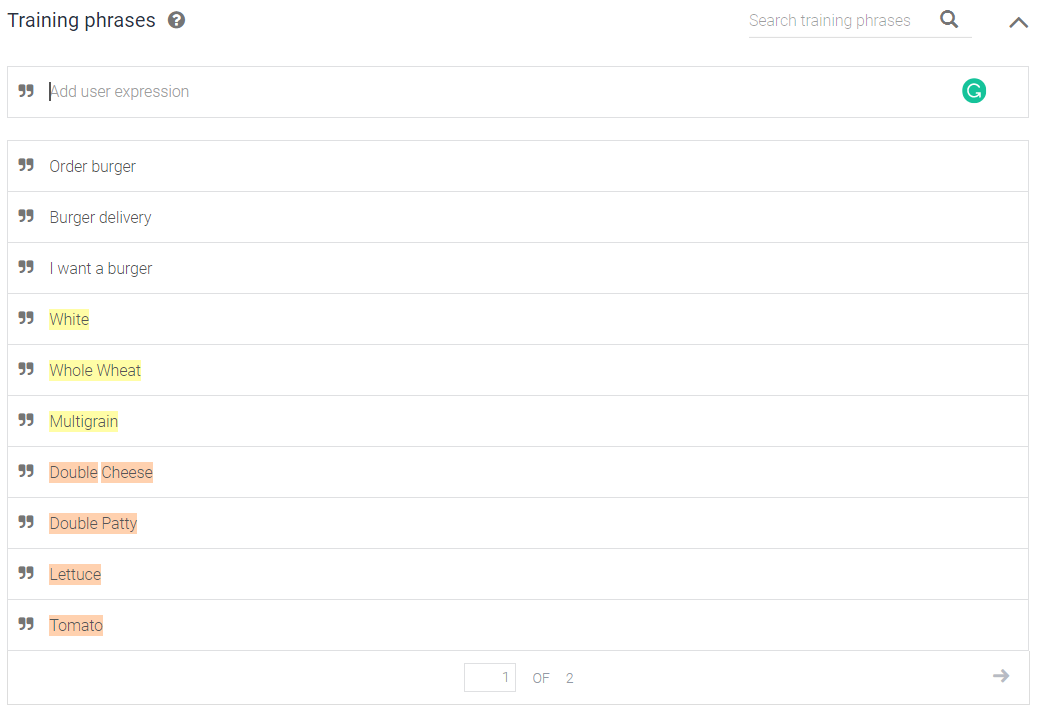
Step 4: Adding Expressions
- Proceed to add the training phrases
- Notice automatic colour coded annotation
- Manually annotate (if required) by right clicking the phrases and assigning the entities
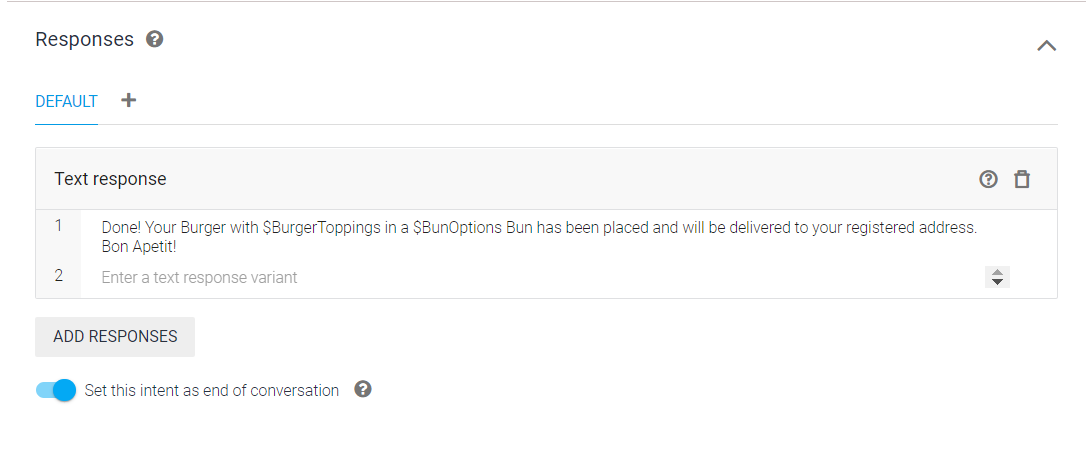
Step 5: Adding the Response
- Draft a concluding response.
- Include the ‘$value’ in the message so that it can copy useful information from the Parameters. Refer to the image below.
- Toggle on the Intent as ‘end of conversation’.
Level 4: Integration
Actual chatbot deployment on platforms, like your websites, etc. is a complicated procedure that required publishing the bot. But we can still get an idea of how the chatbot would appear when functional. Here’s how:
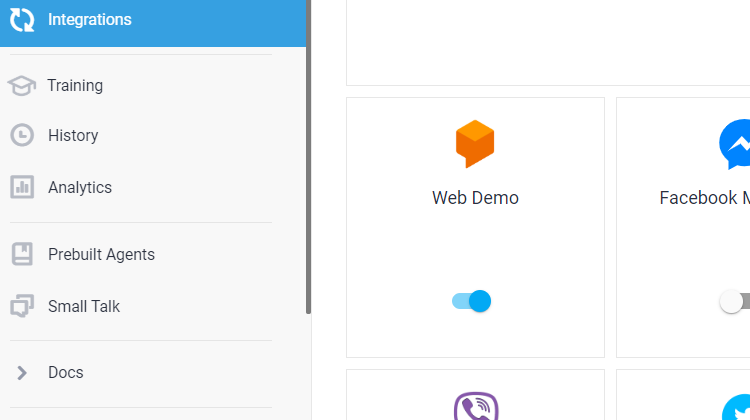
- Navigate to the ‘Integration’ section in the left column
- Toggle ‘Web Demo’ On, then click it to enter
Click the URL
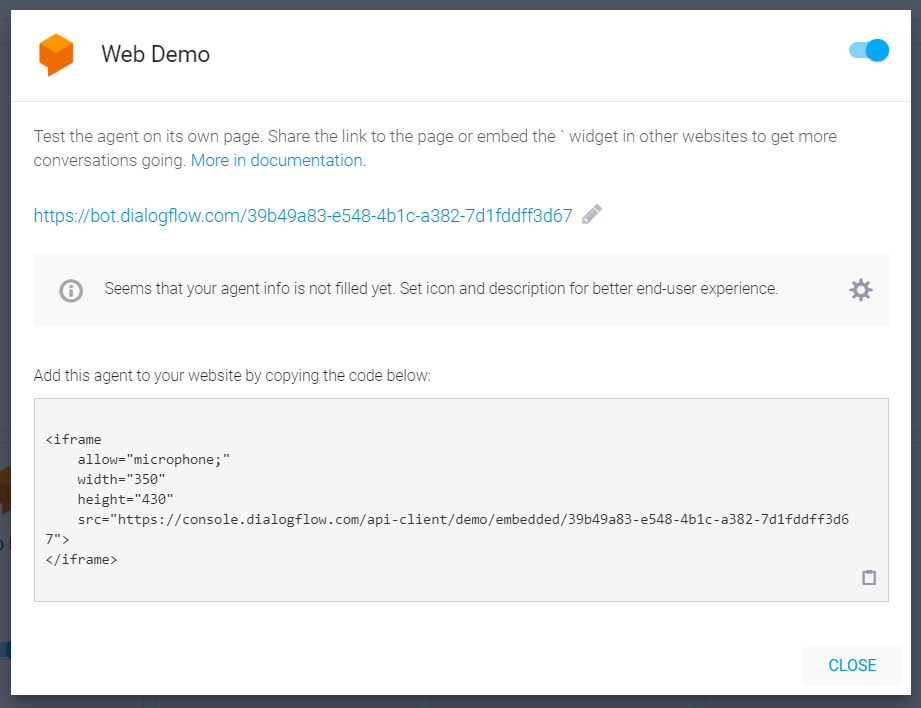
Start Interacting!
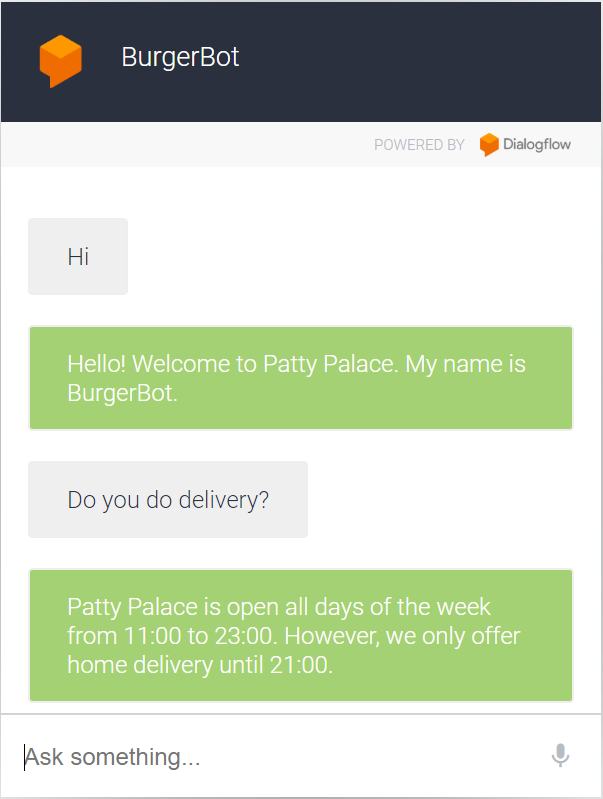
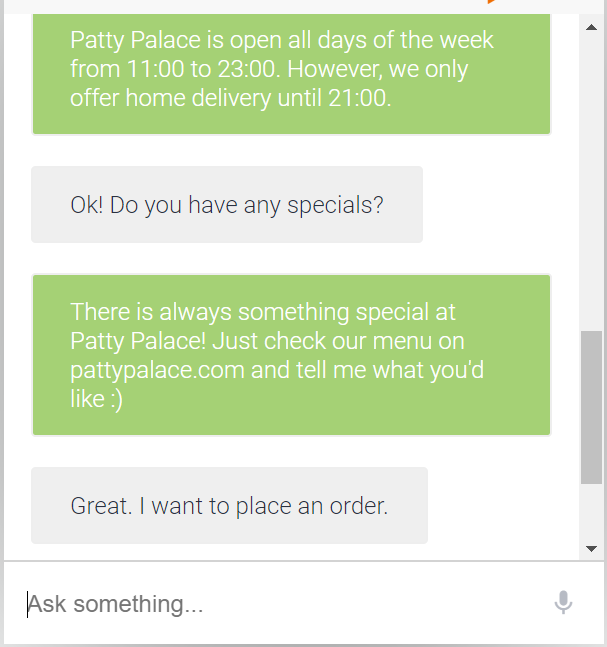
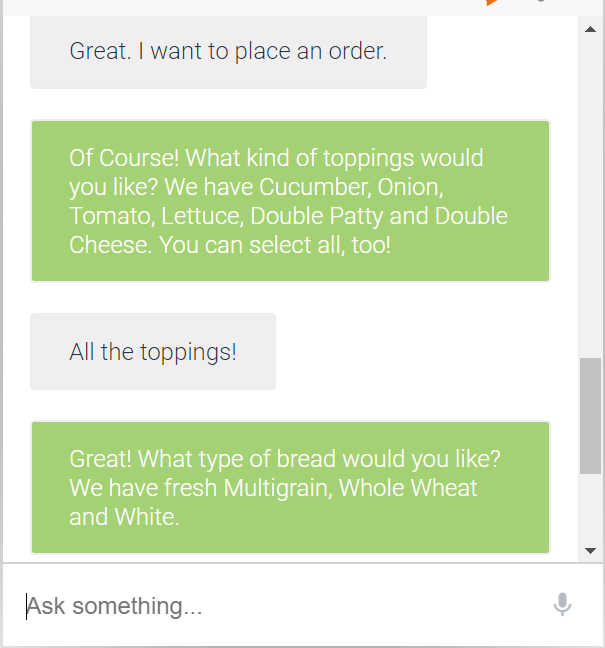
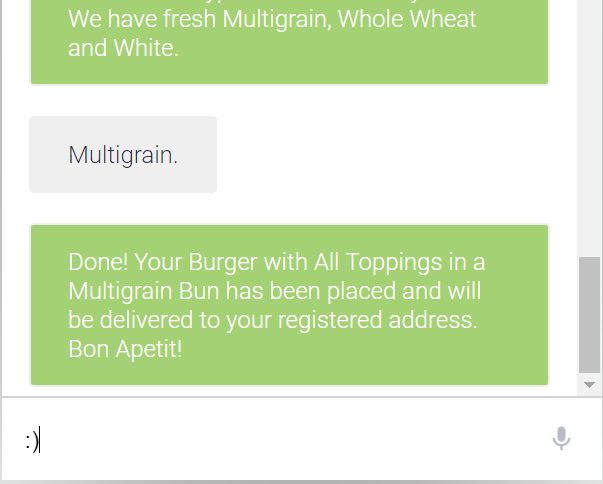
Here’s how skilled our BurgerBot has gotten:
Level 5: Training & Fallbacks
Let’s get back to the Dialogflow framework. It is important to keep training the chatbot to improve its accuracy, fix errors and accommodate fallbacks. Remember that this is a smart bot; it uses machine learning to improve itself. It constantly learns based on it’s interactions & training.
Step 1: Training
- Navigate to the ‘Training’ section in the left menu.
- Select one of the rows of data. Each row is a conversation.
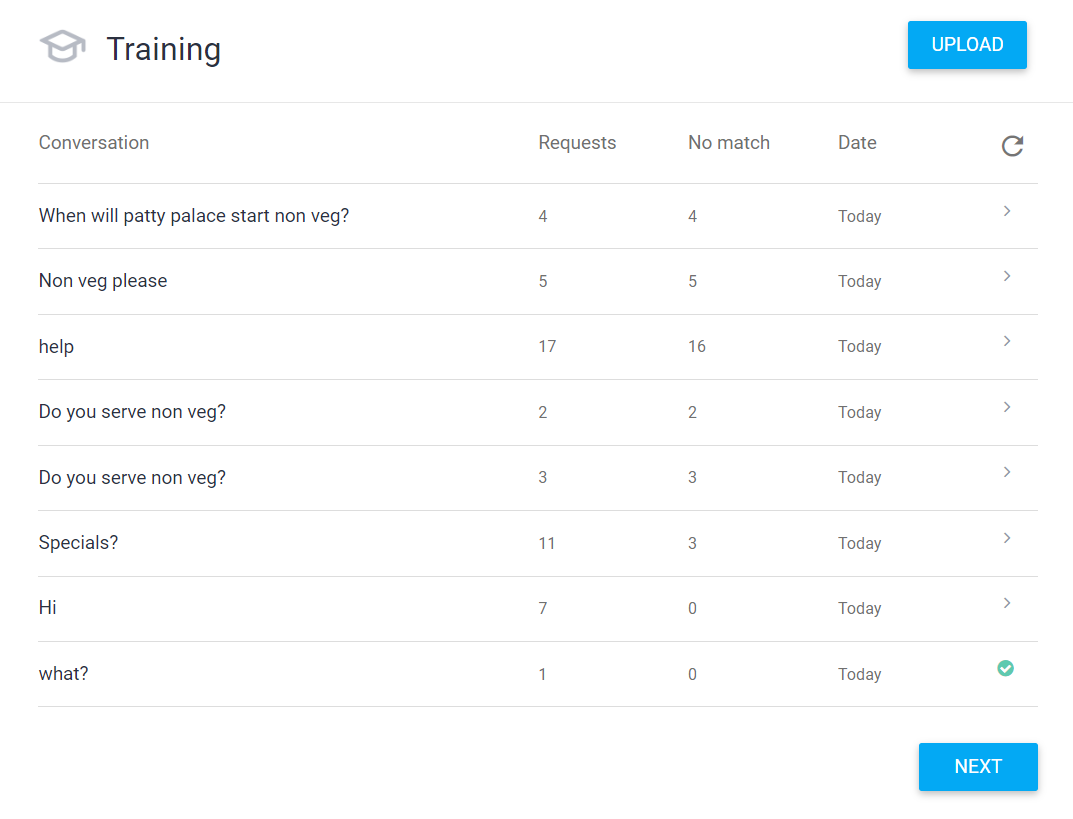
- Click the conversation to view the session window.
- Study the session. If an Intent has been mismatched, then right click and correct it.
- Double check before approving. Incorrect approving will only teach the bot to make more mistakes.
- Check this example where our BurgerBot misread the Intent when the expression was “There is no non veg burger”, and how we corrected it to a Fallback Intent.

Error
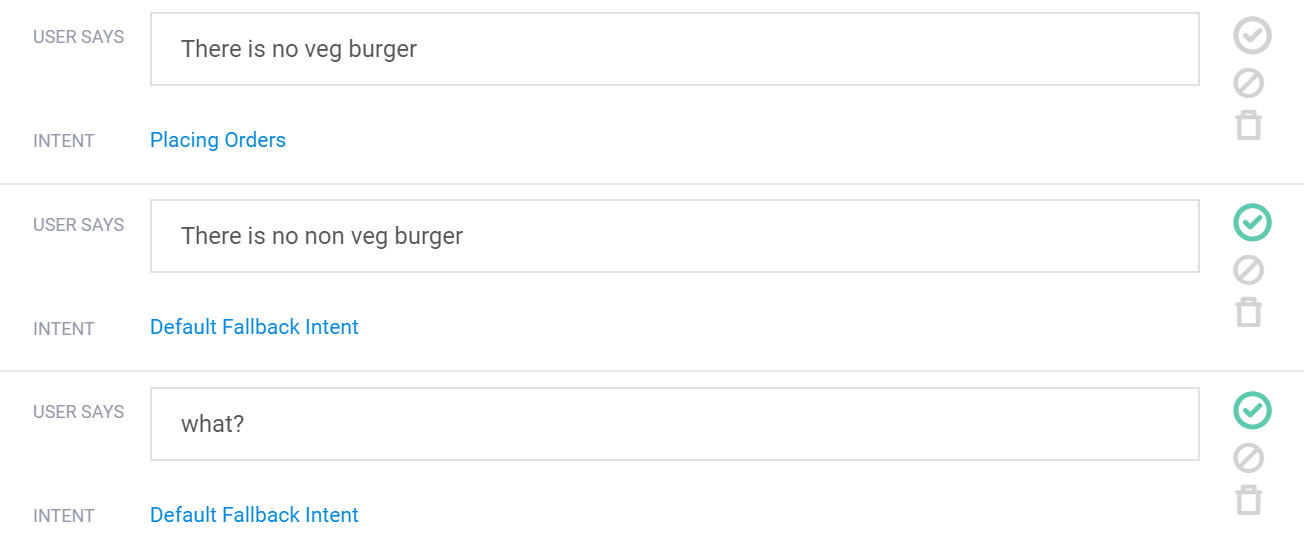
Trained
Step 2: Fallback
What happens when a chatbot doesn’t know the answer to a question?
For example –
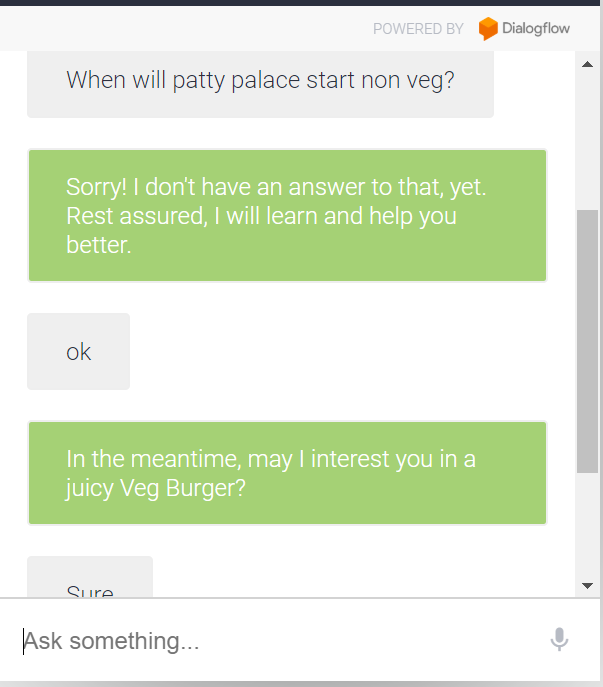
“When will Patty Palace serve non-veg burgers?”
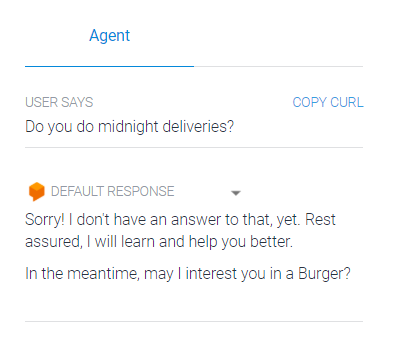
“When do you start midnight deliveries?”
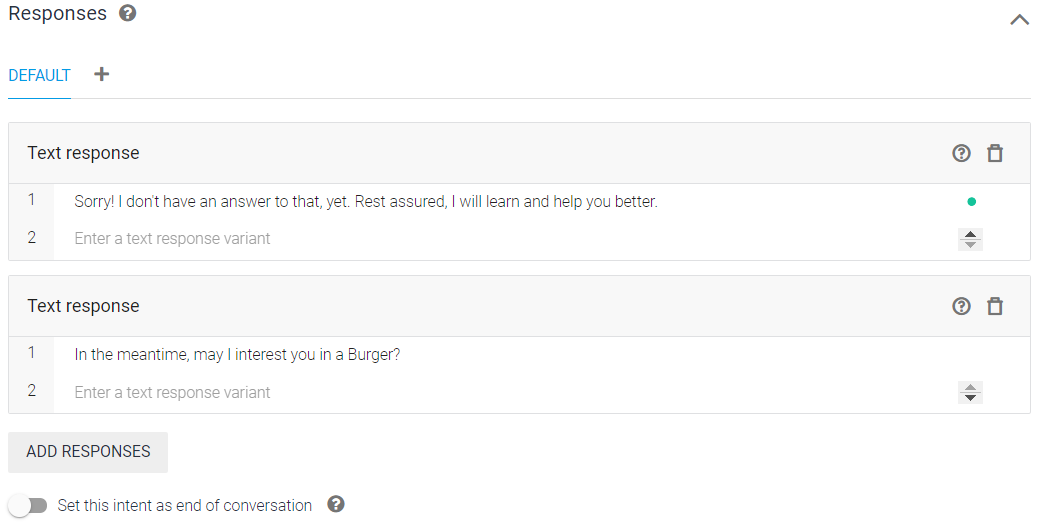
To tackle such questions, create a response in the Default Fallback Intent to adjust expectations with the user.
Remember, all this data is being collected in sessions. So when you have enough expressions from users asking about new things, you can collate them to continue adding Intents.
Step 3: Building new skills
- Check your BurgerBot’s conversation history by selecting ‘History’ in the left column.
- Collate questions that triggered fallback responses
- Repeat steps learnt before to create new intents.
- Continue adding to and training your bot.
Congratulations on completing the guide! You can now show off your very own BurgerBot!
Moving Ahead
There is a lot more to building a Dialogflow chatbot that cannot be covered in these 5 levels. The production bots of today employ various methods of deployment, customisation, and even coding.
At Maruti Techlabs, we have built interactive chatbots on Dialogflow for a series of use cases ranging from hospitality, healthcare, finance, real estate and more.
Regardless of your industry or scale of business, if you are looking to embrace bots as a part of your digital initiative, be sure to take a look at our Bot Development services, drop us a note on hello@marutitech.com and see how we can create and deliver conversational experiences for you!


